Snuffle Mat Checklist: DIY Enrichment That Turns Treat Time Into a Nose-Work Game
A snuffle mat channels a dog’s natural sniffing instincts into a calm, rewarding activity. This checklist-style guide breaks the process into simple steps—materials, build options, safety checks, and training tips—so a homemade mat is durable, washable, and genuinely fun for daily enrichment.
What a Snuffle Mat Does (and Why Dogs Love It)
- Encourages natural foraging and sniffing, helping many dogs settle and focus.
- Provides low-impact mental enrichment on rainy days, recovery days, or busy workdays.
- Can slow fast eaters by spreading kibble and treats across fabric folds.
- Gives shy or high-energy dogs a predictable “job” that builds confidence.
- Works as a training tool for “search,” “find it,” and impulse-control routines.
Sniffing is real work for dogs—in the best way. Enrichment that taps natural behaviors supports welfare and reduces boredom. For deeper reading, see RSPCA guidance on enrichment and the AKC overview of scent work activities.
Before You Start: A Quick Suitability Check
- Best for: food-motivated dogs that can sniff and forage without shredding fabric.
- Use extra supervision for: puppies, powerful chewers, and dogs who swallow non-food items.
- Skip or modify if: there’s a history of foreign-body ingestion, resource guarding around food, or respiratory discomfort when snuffling.
- Choose treat size based on skill: bigger, smellier treats for beginners; smaller pieces for advanced dogs.
- Decide the goal: calm-down activity, slow-feeding, confidence building, or scent-work practice.
If you’re unsure whether food-based games are a good fit (especially with guarding or anxiety), the ASPCA dog behavior resources are a helpful starting point for management and next steps.
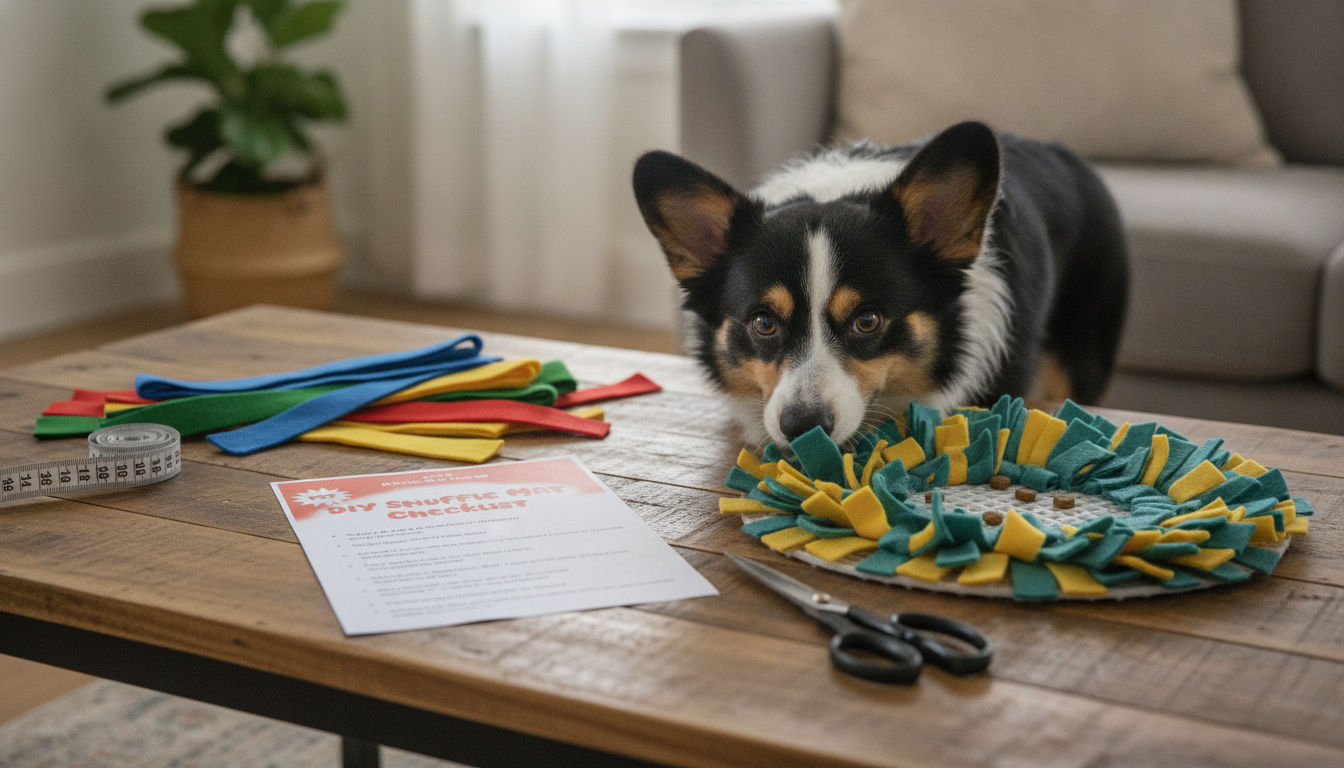
Materials Checklist (Pick Your Build Style)
- Base option A (most common): rubber sink mat with holes, or a sturdy rubber doormat labeled pet-safe (avoid crumbly backing).
- Base option B: heavy-duty plastic mesh canvas (craft mesh) for a lightweight, portable mat.
- Fabric: fleece strips resist fraying and wash well; cotton jersey works but may stretch; avoid fabrics that shed strings.
- Tools: sharp scissors or rotary cutter, ruler or cutting mat, optional safety pin or bodkin for threading strips.
- Treats: dry kibble, freeze-dried toppers, or low-crumb training treats; avoid sticky foods that gum up fabric.
- Optional upgrades: non-slip rug pad underneath, storage bin, name label, and a small brush for cleanup.
Build Options at a Glance
| Option |
Best for |
Pros |
Watch-outs |
| Rubber sink mat + fleece strips |
Most households |
Stable, easy to hide treats, washable |
Check rubber quality; supervise chewers |
| Plastic craft mesh + fleece strips |
Travel and lightweight setups |
Easy to cut to size, inexpensive |
Edges can be sharp—bind or trim carefully |
| Felt or fabric base (sewn) |
Crafting with a sewing machine |
Custom shapes and pockets |
Higher effort; ensure strong seams and safe fabrics |
| Repurposed towel mat (braided/knotted) |
Low-waste builds |
Soft texture, simple knots |
Can loosen over time; check for long threads |
Cutting Guide: Strip Sizes That Work
- Standard strip size: 1–1.5 inches wide and 6–8 inches long for medium mats.
- For small dogs or dense mats: 1 inch wide, 5–6 inches long for tighter coverage.
- For large mats: 1.5 inches wide, 8–10 inches long to create deeper folds.
- Aim for enough strips to fill most holes; a “two-thirds full” mat is often easier to clean while still challenging.
- Mix colors to create visual sections (helpful when practicing patterns like “search left/right”).
For a tidy workflow, pre-cut your strips into stacks by length, then keep a “trim pile” for finishing touches at the end. That final trimming step is what often prevents the mat from turning into a tempting tug toy.
Assembly Checklist: The No-Sew Tie Method
- Step 1: Anchor the base on a non-slip surface so it doesn’t slide while tying.
- Step 2: Thread one fleece strip through a hole (or mesh square) so both ends are even.
- Step 3: Tie a firm double-knot on the top side; pull snug but don’t distort the base.
- Step 4: Repeat in a pattern (every other hole first, then fill gaps) to keep tension even.
- Step 5: Create varied texture by alternating tight knots with slightly looser ones for “pockets.”
- Step 6: Final pass: tug-test random knots; re-tie any that slip.
- Step 7: Trim any overly long ends so they don’t tempt chewing.
Difficulty Levels: Make It Easy, Medium, or Brainy
Training Routine: Turning Snuffling Into a Calm Skill
Safety & Clean-Up Checks (Print and Use Each Time)
Make It a Gift: Simple Ways to Package a DIY Snuffle Mat
Printable Checklist Resource
Printable Snuffle Mat Checklist and DIY guide
More Pet Checklists & Guides (In Stock)
FAQ
How long should a snuffle mat session last?
Start with 1–5 minutes, especially for beginners or dogs who get amped up fast. Calm, experienced dogs can often enjoy 10–15 minutes, but stop early if frustration, ripping, or chewing starts.
What treats work best in a snuffle mat?
Dry kibble, freeze-dried pieces, and low-crumb training treats tend to work best because they drop into folds without gumming up fabric. Avoid sticky or wet foods that cling to fleece, spoil quickly, or make cleanup harder.
Can a snuffle mat replace a walk?
A snuffle mat is great mental enrichment, but it doesn’t fully replace physical exercise and outdoor exposure. Pair it with short walks, quick training sessions, or indoor play based on weather and your dog’s mobility.
Recommended for you


Leave a comment